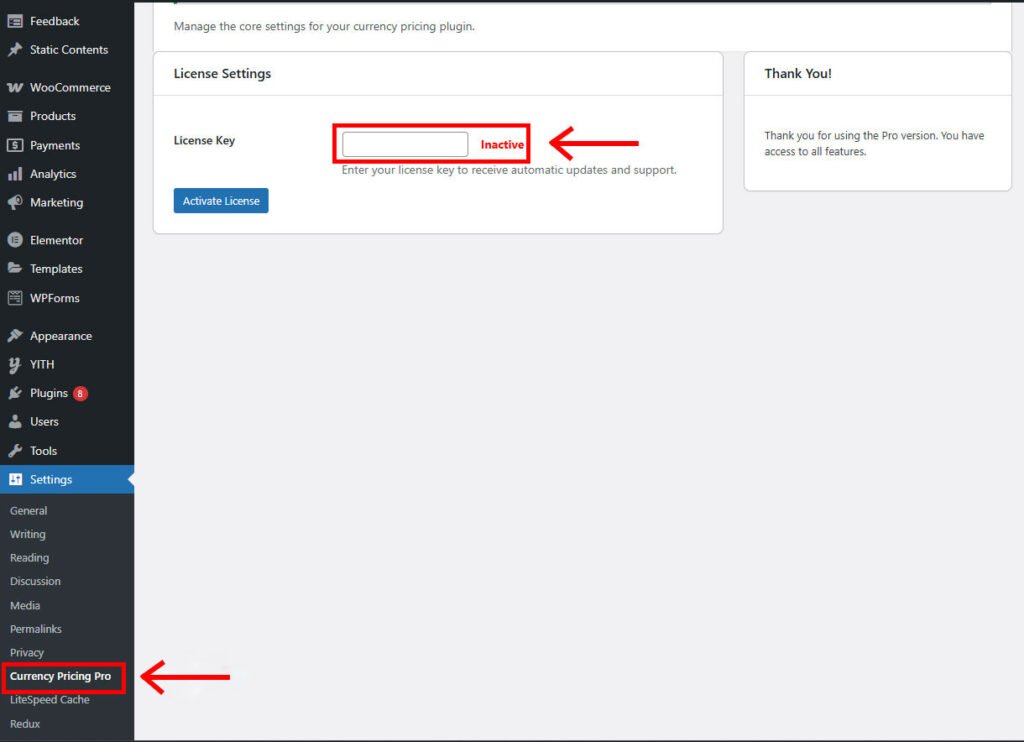
Step 1: Activate Your License Key
When you first install the plugin, your license is inactive as shown below. To unlock all Pro features and enable automatic updates, you need to activate your license. Simply paste the license key you received in your purchase email into the field and click the ‘Activate License’ button.
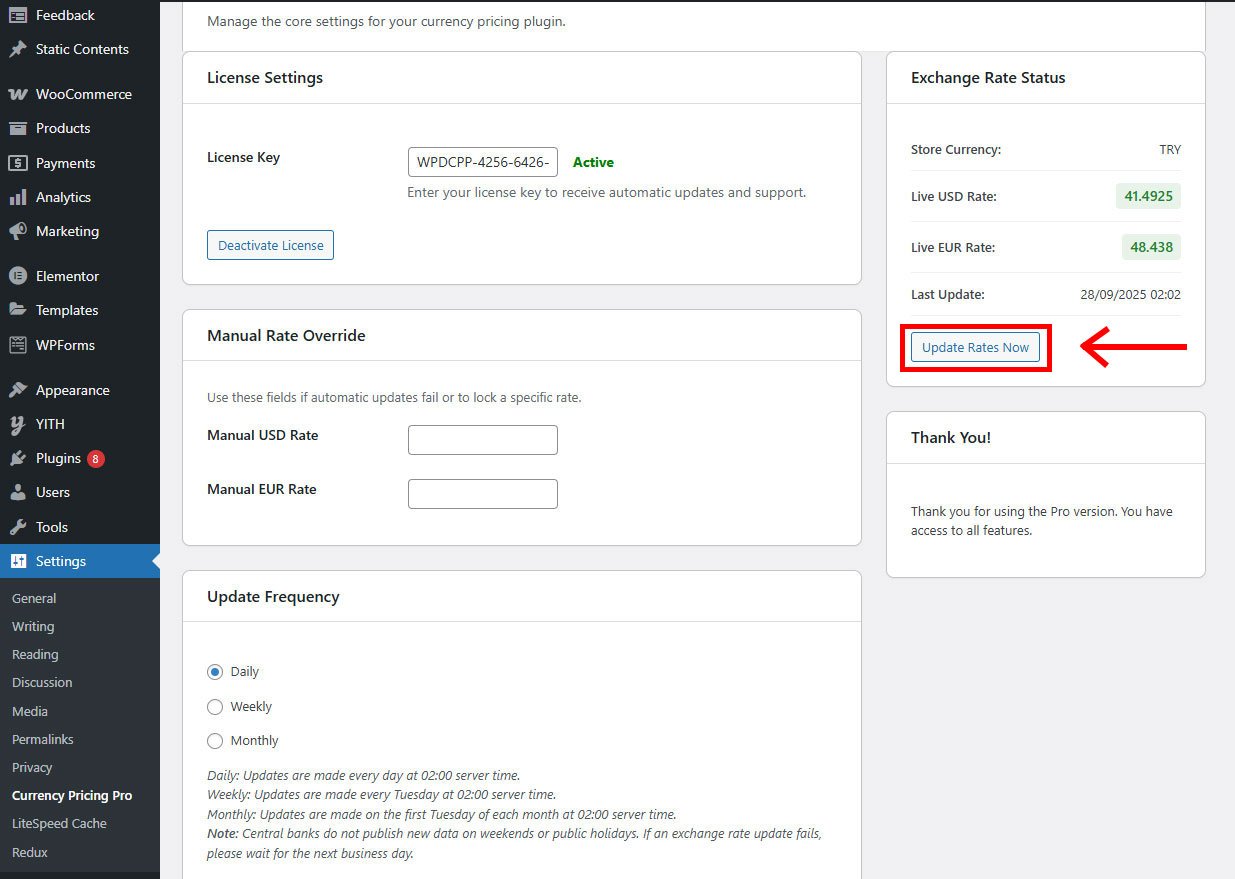
Step 2: Activation Successful!
Once your license is verified, you will see an ‘Active’ status. Your plugin is now fully enabled. To get started, click the “Update Rates Now” button to perform the initial synchronization. You only need to do this once; the plugin will automatically update the rates based on your selection (daily, weekly, monthly) from now on. You can now start setting dynamic prices for your WooCommerce products.
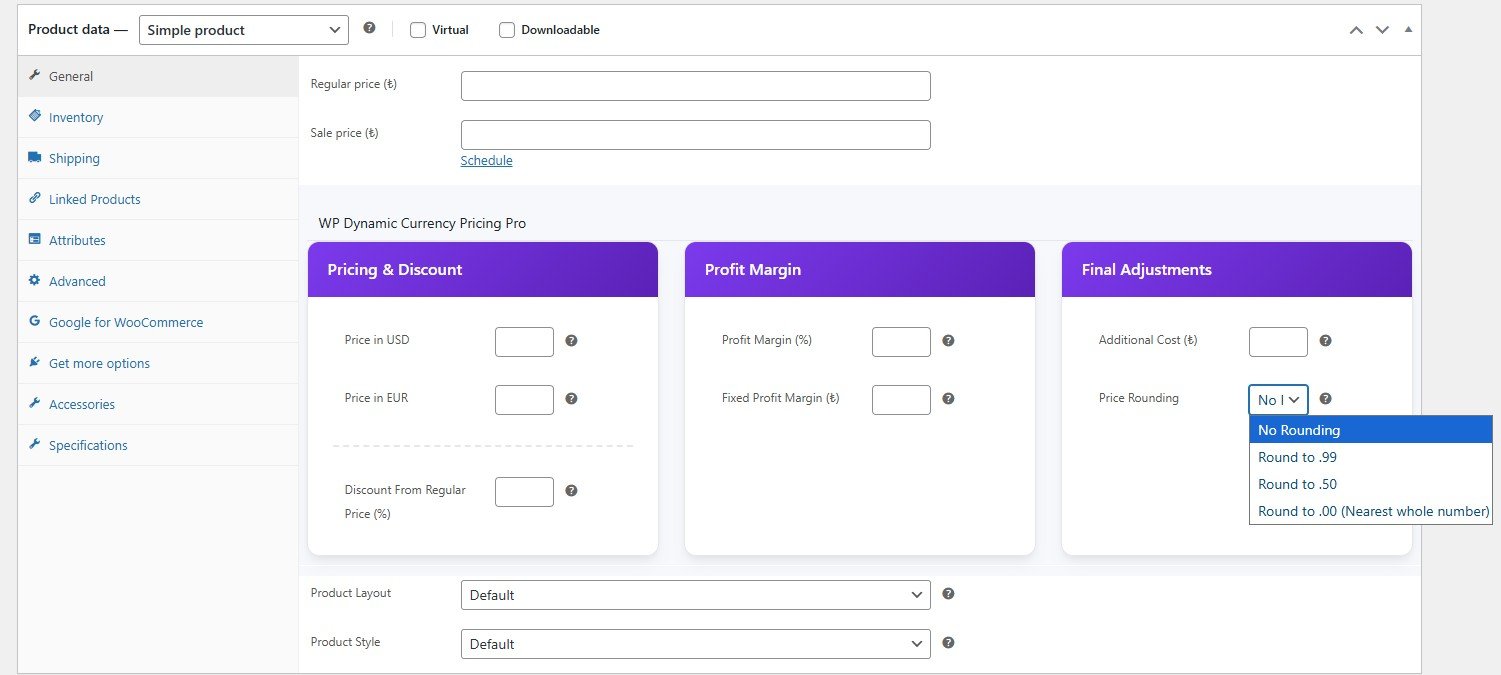
Step 3: Set Your First Dynamic Price
Maps to any product’s edit page in WooCommerce. You will find the WP Dynamic Currency Pricing Pro panel in the “Product data” section. Here you can:
- Set a base price in a stable currency (like USD or EUR).
- Add an optional profit margin (fixed or percentage).
- Include additional costs like shipping fees.
- Choose a price rounding rule.
Fill in the desired fields and click ‘Update’ to save your product.
After saving the product, visit the product page on your storefront. The plugin will automatically display the final price, perfectly calculated in your store’s main currency based on the latest exchange rates. Congratulations, you’ve set up your first dynamic price!